
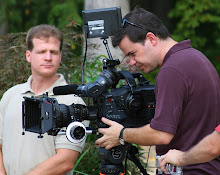
Here's a quick example of a fast, simple, yet very effective green-screen setup.
A total of four lights. We're using the 1K ARRI open face light with a Chimera as the key light, bouncing light off a Flexfill for the fill. This soft lighting is very flattering to the talent, and also easier on them to work under when there are a few hours of video to shoot with this setup, which is what we had here. We've got a 150 watt ARRI fresnel as a back light, on a dimmer so we can dial in the right amount of light. The green screen, which is simply a 24' x 12' piece of medium weight fabric designed for this use, is hung from the drop ceiling using spring clips. It's being lit with a pair of well-worn MiniMole 200 watt fresnels, one on each side.
Here's a screen capture of the resulting shot -
There are a few things to note here. First of all, we have the luxury of being in a big room here, allowing us a lot of distance between the camera, the talent and green screen. Having some distance between these elements enables us to use a long lens, which in turn makes our background go soft, helping to minimize any issues with wrinkles in the green fabric. Using one of the camera's neutral density filters means we can open up the iris, which also helps give us a shallow depth of field.
Having the green screen a good distance from the talent minimizes the amount of green light spilling on the talent, making for an easier key. This is an important point - it's a common mistake to blast the green screen with light. Even light is the most important thing here. In this particular case I ended up dimming the key light in order to make the relative level of the green screen higher, since I had plenty of sensitivity in the camera. I also tend to make my backlight a little hotter than I otherwise would, since having a nice rim on the talent helps separate them from the background. The light is falling off a bit in the top right corner, but that's okay since we'll be using a garbage matte when we go to key this.
Next time we'll load this footage into After Effects and do some keying. Stay tuned...
Support PixelCadabra Via Our Amazon Main Page

2 comments:
I find it can really help to put some diffusion on the lighting for the wall.
Adam - Agreed! The softer you make the light source for the background, the less you have to deal with wrinkles showing up. Excellent point.
Post a Comment